Introduction to Vintage Chocolate Crinkle Cookies
When we think of culinary trends, there’s something undeniably charming about the resurgence of vintage recipes. Among these delightful treats, vintage chocolate crinkle cookies are stealing hearts and taste buds alike, making their way back into our kitchens and onto our dessert platters. But why are we so drawn to these nostalgic sweets?
Why Vintage Recipes Are Making a Comeback
In today’s fast-paced world, many young professionals are seeking comfort in the familiar. Vintage recipes offer a unique blend of nostalgia and simplicity, evoking memories of baking with family during the holidays or enjoying a homemade treat after school. According to a study by the American Pie Council, nearly 75% of adults enjoy baking because it brings back cherished memories, highlighting the emotional connection we nurture with our food.
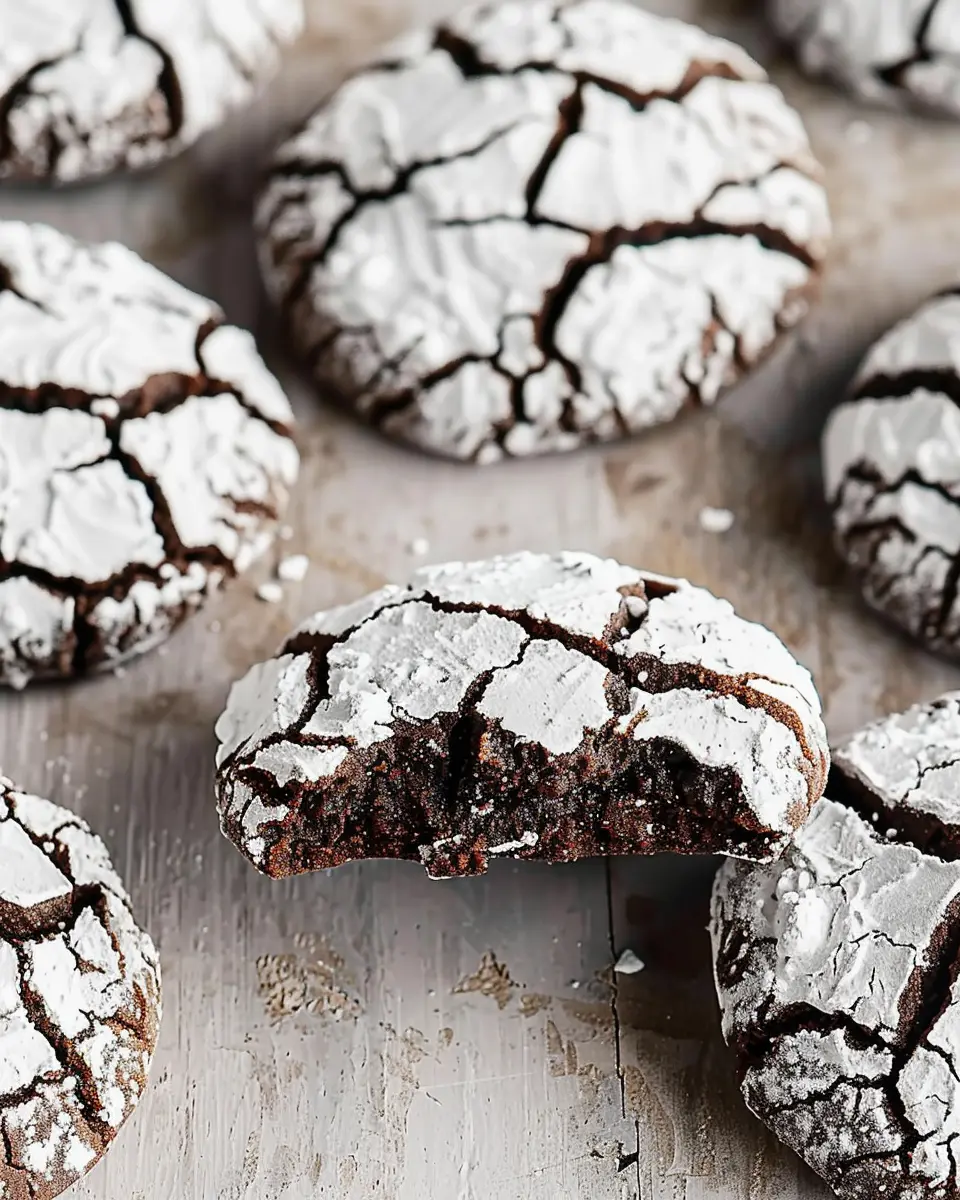
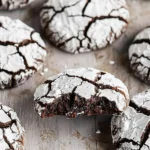
These chocolate crinkle cookies are a fantastic example of vintage desserts that combine straightforward ingredients with an enticing flavor profile. The contrast between their crackly exterior and delightfully soft, fudgy interior creates a textural wonder that many modern desserts just can’t match.
Plus, there’s a growing awareness of how vintage cooking methods often emphasize whole, natural ingredients. This aligns well with current trends of sustainable eating and mindful cooking. In their essence, vintage chocolate crinkle cookies remind us that delicious doesn’t always need to be complicated. You can whip them up with just flour, sugar, cocoa powder, and a few other pantry staples!
Incorporating these cookies into your baking repertoire is not just about enjoying a delicious treat; it’s a celebration of culinary history. By sharing these recipes, we keep the traditions alive and foster connections with those who came before us. As you gather with friends or family, perhaps ask them about their favorite childhood desserts. You might find that their stories and memories add further warmth and context to your own baking journey.
As you prepare to make these delightful cookies, remember: it’s not just about the end product, but the love and memories that go into creating them. A plate of vintage chocolate crinkle cookies isn’t just a dessert—it’s an invitation to create memories.
For a delightful twist on your baking adventures, explore more vintage recipes here. Happy baking!
Ingredients for Vintage Chocolate Crinkle Cookies
Essential ingredients for the perfect cookie
Baking vintage chocolate crinkle cookies is all about using the right ingredients to achieve that perfect fudgy, cracked appearance. Here’s what you’ll need:
- All-purpose flour: The foundation for structure.
- Cocoa powder: Opt for unsweetened to control the sweetness.
- Granulated sugar: Adds sweetness and helps create the crinkle.
- Brown sugar: Enhances moisture and gives that delicious caramel flavor.
- Baking powder: Essential for that light and airy texture.
- Eggs: Bind the ingredients together while adding richness.
- Vegetable oil: Enhances the cookie’s chewiness and contributes to that melt-in-your-mouth texture.
- Powdered sugar: A must for dusting and giving those cookies their signature finish.
Optional ingredients for an extra twist
Feeling adventurous with your vintage chocolate crinkle cookies? Consider adding some optional ingredients for an exciting twist:
- Chocolate chips: Dark or semi-sweet for extra indulgence.
- Nuts: Walnuts or pecans add a delightful crunch.
- Espresso powder: A pinch can intensify the chocolate flavor.
- Mint extract: For a refreshing change that pairs beautifully with chocolate.
These additions can transform your cookies into a family favorite, making them perfect for sharing (or keeping all for yourself). For more detailed guidance on ingredient quality and substitution, check out Serious Eats or King Arthur Baking. Happy baking!
Step-by-step Preparation of Vintage Chocolate Crinkle Cookies
Making vintage chocolate crinkle cookies is a delightful experience filled with rich chocolate flavor and delightful textures. The process is straightforward and rewarding, perfect for anyone looking to impress family and friends with a classic treat. Let’s break it down step by step.
Gather and prepare your ingredients
Before diving into the recipe, it’s crucial to gather all your ingredients. This makes the baking process smoother and more enjoyable. Here’s what you’ll need:
- 1 cup all-purpose flour
- 1 teaspoon baking powder
- ¼ teaspoon salt
- ½ cup unsweetened cocoa powder
- 1 cup granulated sugar
- ½ cup brown sugar, packed
- ½ cup vegetable oil
- 2 large eggs
- 1 teaspoon vanilla extract
- Powdered sugar for rolling
Having everything laid out not only speeds things up but also gives you the opportunity to double-check that you haven’t missed anything essential. Once you’ve got your ingredients ready, you’re all set to start mixing!
Mix the dry ingredients
In a medium bowl, combine your dry ingredients: flour, baking powder, salt, and cocoa powder. Using a whisk to mix these ingredients thoroughly will help distribute them evenly, ensuring consistent flavor and texture throughout the cookies. Did you know that this step is vital for achieving that signature crinkle effect? Properly aerating the dry mix helps develop the cookies’ rise.
You can learn more about baking science on channels like Serious Eats if you’re curious about how these ingredients work together.
Create the chocolate dough
Next, in a separate large bowl, mix the granulated sugar, brown sugar, and vegetable oil until well combined. Then, add the eggs one at a time, mixing well after each addition. Adding vanilla extract at this stage enhances the flavor, making your cookies even more delicious.
Gradually add the dry mixture to the wet mixture, stirring until the dough is well combined. It might be a bit sticky, but don’t worry! This is exactly what we want for vintage chocolate crinkle cookies.
Chill the dough for optimal texture
Chilling is an essential step that shouldn’t be skipped. Wrap the dough in plastic wrap or store it in an airtight container, and chill it in the refrigerator for at least 2 hours, or even overnight if you have the time. Chilling helps the flavors meld and makes the dough easier to handle, resulting in cookies that are perfectly chewy and fudgy.
Shape and coat the cookies
Once your dough is chilled, it’s time to shape the cookies. Preheat your oven to 350°F (175°C) while you scoop out tablespoons of dough and roll them into balls.
To get that characteristic crinkle look, roll each ball in powdered sugar until they are generously coated. This not only enhances appearance but also adds a lovely sweetness to each bite.
Tip: Place the dough balls on a parchment-lined baking sheet, spaced about two inches apart, to give them room to spread.
Bake to perfection
Now comes the best part: baking your vintage chocolate crinkle cookies. Bake them in your preheated oven for about 10-12 minutes. Keep an eye on them, as you want them to look slightly underbaked when you take them out. They will continue to firm up as they cool, striking that ideal balance between crispy edges and a chewy center.
Let the cookies rest on the baking sheet for a few minutes before transferring them to a wire rack to cool completely. Trust me, the aroma filling your kitchen during baking will be downright irresistible!
By following these steps, you’re well on your way to enjoying some delicious vintage chocolate crinkle cookies that are sure to be a hit at any gathering. Happy baking!

Variations on Vintage Chocolate Crinkle Cookies
Spin on Flavors: Mint Chocolate Crinkle Cookies
If you’re looking to add a refreshing twist to your classic vintage chocolate crinkle cookies, why not try mint? These mint chocolate crinkle cookies are an absolute delight, combining the rich chocolate flavor with the invigorating zest of mint. Simply incorporate a few drops of peppermint extract into your dough before mixing. You can even fold in some chopped peppermint patties for an extra surprise in every bite!
For those who enjoy a garnish, consider dusting them with crushed peppermint candies right before baking. The candy adds an exciting crunch and a pop of color, making your cookies perfect for holiday gatherings and special occasions.
Gluten-Free Version of Chocolate Crinkle Cookies
For those with dietary restrictions, don’t fret! Making gluten-free vintage chocolate crinkle cookies is simpler than you might think. Start by swapping out regular flour for a high-quality gluten-free blend. It’s usually a one-to-one substitute, which means you won’t miss the gluten in texture or taste. Brands like Bob’s Red Mill or King Arthur Flour provide excellent options for baking.
To ensure your cookies remain moist and chewy, consider adding a bit of almond flour or coconut flour to the mix. Not only will this enhance the flavor, but it also contributes to a unique texture that everyone will love.
Making these adaptations allows you to share the joy of vintage chocolate crinkle cookies with everyone, regardless of dietary preferences.
For more tips on gluten-free baking, check out Gluten Free Living for ideas that will inspire your inner baker!
Cooking Tips and Notes for Vintage Chocolate Crinkle Cookies
Common pitfalls and how to avoid them
Making vintage chocolate crinkle cookies can be a delightful experience, but like any recipe, there are a few common pitfalls to watch out for:
- Overmixing the dough: This can lead to tough cookies. Mix until just combined to keep that soft, chewy texture.
- Chilling the dough too long: While chilling helps the flavors meld, leaving it for over 24 hours might make it too firm. Aim for about 1-2 hours for the best results.
- Incorrect oven temperature: Always preheat your oven! A too-hot oven can cause your cookies to spread too much, losing their signature crinkle.
To elevate your baking, consider using high-quality cocoa powder, as it can dramatically enhance the flavor of your vintage chocolate crinkle cookies.
Also, keep in mind the need for good cooling space—using cooling racks can help maintain their soft texture. For more tips, check out the Joy of Baking for helpful baking advice! Happy baking!
Serving Suggestions for Vintage Chocolate Crinkle Cookies
Pairing Cookies with Beverages
Looking for the perfect beverage to accompany your vintage chocolate crinkle cookies? You can’t go wrong with a rich cup of coffee or a smooth cup of hot cocoa. The bold flavors of coffee complement the sweetness of the cookies beautifully, while hot cocoa provides a classic chocolate experience. If you want something fruitier, try pairing your cookies with a refreshing glass of cold milk or even fruit-infused herbal tea for a unique twist.
Creative Ways to Present Your Cookies
Presentation can elevate your vintage chocolate crinkle cookies from ordinary to extraordinary. Consider arranging them on a rustic wooden board or a colorful cake stand. You can also package them in clear bags tied with twine for a charming gift idea. Don’t forget to sprinkle a bit of powdered sugar on top right before serving; it adds a touch of elegance and visual appeal!
For some additional inspiration, you might explore The Spruce Eats for creative serving ideas or Food52 for user-submitted tips!
Time Breakdown for Vintage Chocolate Crinkle Cookies
Planning to make vintage chocolate crinkle cookies? Let’s break down the time you’ll need for this delicious treat so you can enjoy the process without stress.
Preparation Time
Get ready to roll up your sleeves! You’ll need about 15-20 minutes to gather ingredients and mix the dough. It’s the perfect opportunity to crank up your favorite playlist or podcast.
Chill Time
Patience is key. Once your dough is ready, let it chill in the refrigerator for about 2 hours. This step is crucial for that signature crinkle effect when they bake!
Baking Time
When you’re ready, preheat your oven and bake the cookies for approximately 10-12 minutes. Keep an eye on them to achieve that perfectly soft center!
Total Time
In total, you’re looking at about 2 hours and 45 minutes. Most of this time is hands-off, so you can focus on other tasks while waiting for those delightful cookies to be ready!
For more tips on baking and choosing the best chocolate, check out Serious Eats or BBC Good Food. Happy baking!
Nutritional Facts for Vintage Chocolate Crinkle Cookies
When enjoying vintage chocolate crinkle cookies, it’s essential to consider their nutritional profile, especially if you’re balancing your sweet tooth with a mindful diet.
Calories
Each cookie typically contains around 120 calories. While they’re a treat, moderation is key—after all, it’s easy to lose track when they’re so irresistible!
Sugar Content
These delightful cookies pack a sweet punch, with approximately 10 grams of sugar per serving. For those keeping an eye on their sugar intake, consider sharing or savoring just one at a time.
Other Nutritional Details
In addition to calorie and sugar content, vintage chocolate crinkle cookies offer:
- Fats: About 5 grams, primarily from butter
- Carbohydrates: Roughly 17 grams, providing a quick energy boost
- Protein: Around 1 gram, thanks to the eggs in the recipe
Whether you’re baking for a gathering or treating yourself, knowing their nutritional facts helps balance your indulgence. For more insights on healthy baking alternatives, check out Nutrition.gov or the USDA’s FoodData Central.
FAQs about Vintage Chocolate Crinkle Cookies
Can I make the dough ahead of time?
Absolutely! Making the dough for vintage chocolate crinkle cookies in advance is a fantastic way to save time. Just prepare the dough, then wrap it tightly in plastic wrap or place it in an airtight container. You can refrigerate it for up to 3 days or freeze it for up to a month. When you’re ready to bake, simply thaw if frozen, roll, and coat in powdered sugar before baking. It makes last-minute dessert preparations so easy!
What is the best way to store chocolate crinkle cookies?
To keep your vintage chocolate crinkle cookies fresh, store them in an airtight container at room temperature. If you’re concerned about them losing their delightful texture, consider separating layers with parchment paper to prevent them from sticking together. For an even longer shelf life, these cookies can be frozen for up to 3 months. Just make sure to seal them in a freezer-safe bag or container.
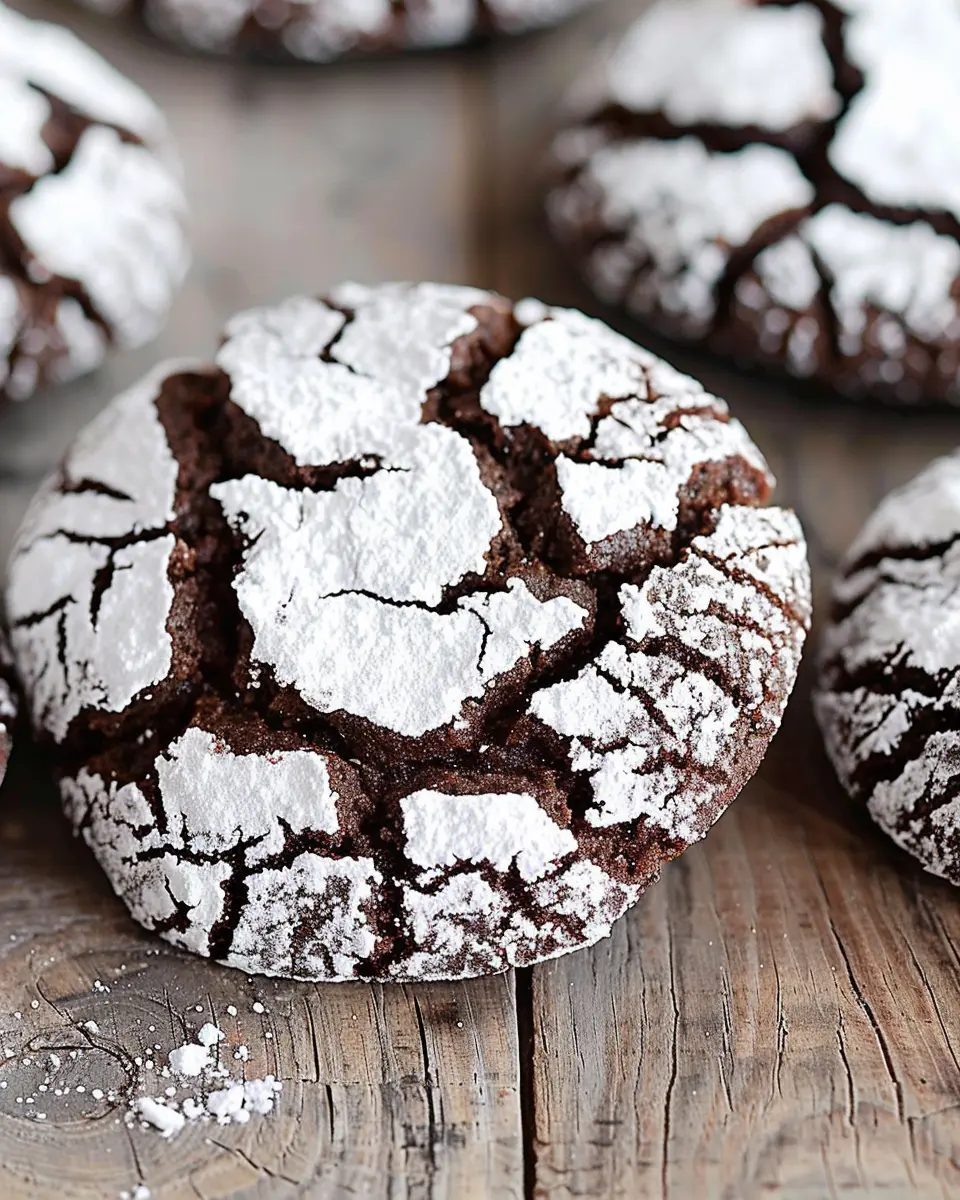
How do I achieve a perfect crack on top?
The signature crack of vintage chocolate crinkle cookies is what makes them so tempting! For that perfect look, follow this simple trick:
- Ensure your cookie dough is well-chilled; this helps the cookies keep their shape and get that beautiful crack.
- Do not skip the powdered sugar coating! This not only adds sweetness but also helps form that iconic crust as the cookies bake.
Baking at a slightly higher temperature (around 350°F) can also enhance the cracks’ appearance, so don’t hesitate to experiment a bit!
Whether you’re a baking novice or a pro, making vintage chocolate crinkle cookies is a fun and rewarding experience. Need more tips? Check out this article on baking science. Happy baking!
Conclusion on Vintage Chocolate Crinkle Cookies
Why you should try making these cookies today
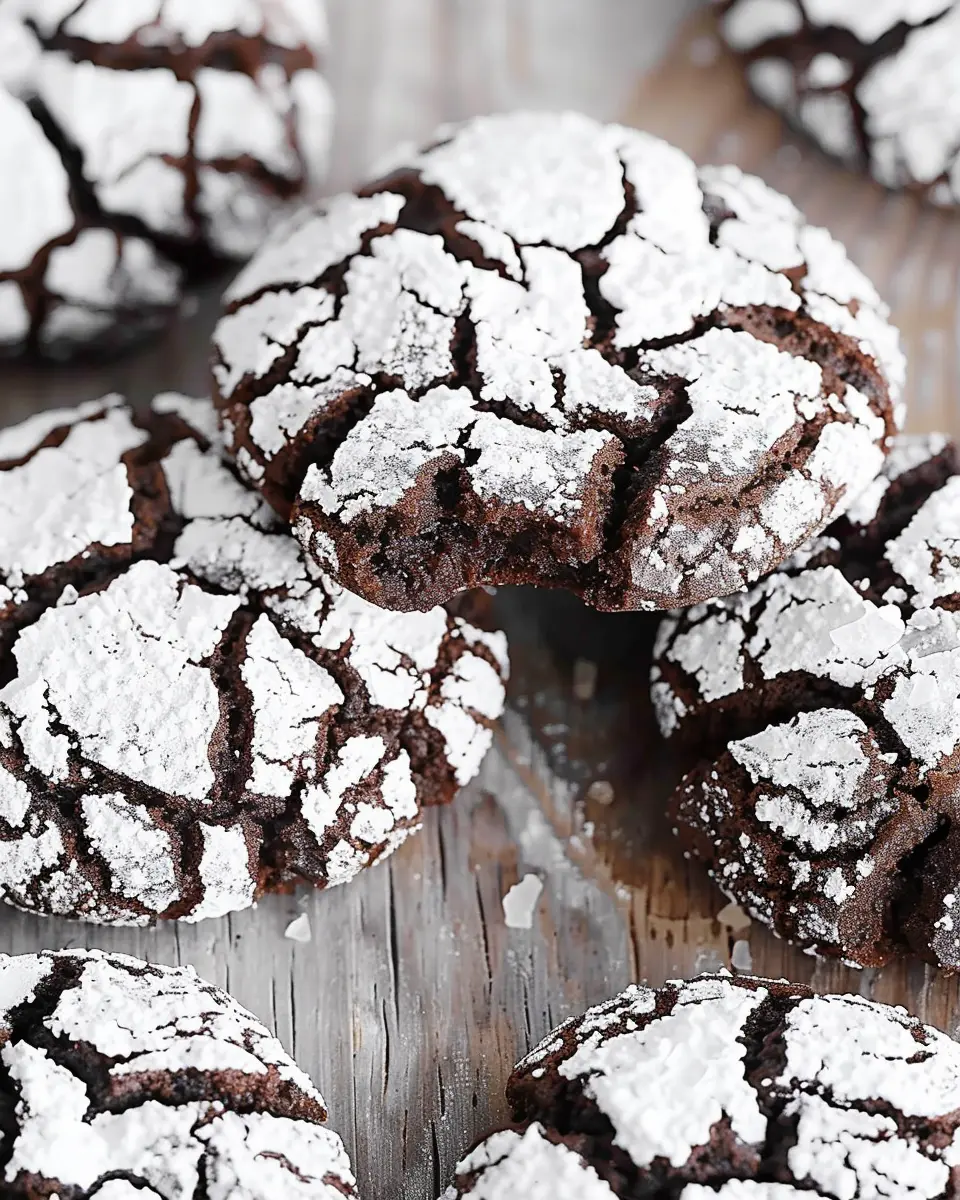
If you’re looking for a delightful way to bring nostalgia into your kitchen, vintage chocolate crinkle cookies are a must-try! These cookies are not only visually appealing with their beautiful cracked tops but also packed with chocolatey goodness that is hard to resist.
Making these cookies today is a perfect opportunity to bond with friends or family over a simple yet satisfying activity. Plus, they are surprisingly easy to whip up! You’ll impress your loved ones with your baking skills and create a memorable treat that they will cherish.
For some additional inspiration, consider pairing these cookies with a warm cup of coffee or a refreshing glass of milk. Check out Food52’s guide to perfect coffee pairings for desserts for an extra touch! Trust me; you won’t regret indulging in these delightful cookies.
PrintVintage chocolate crinkle cookies: The best recipe for nostalgia
- Prep Time: 30 minutes
- Cook Time: 12 minutes
- Total Time: 42 minutes
- Yield: 24 cookies 1x
- Category: Dessert
- Method: Baking
- Cuisine: American
Ingredients
- 1 cup all-purpose flour
- 1/2 cup cocoa powder
- 1 cup granulated sugar
- 1/2 cup brown sugar
- 2 large eggs
- 1/2 cup vegetable oil
- 1 teaspoon vanilla extract
- 1/2 teaspoon baking powder
- 1/4 teaspoon salt
- 1/2 cup powdered sugar
Instructions
- Preheat your oven to 350°F (175°C).
- In a mixing bowl, combine the flour, cocoa powder, baking powder, and salt.
- In a separate bowl, whisk together the granulated sugar, brown sugar, eggs, vegetable oil, and vanilla extract until smooth.
- Gradually add the dry ingredients to the wet ingredients, mixing until just combined.
- Chill the dough in the refrigerator for 30 minutes.
- Once chilled, scoop the dough into balls and roll them in powdered sugar.
- Place the dough balls on a baking sheet lined with parchment paper.
- Bake for 10-12 minutes until the edges are set.
- Let them cool on the baking sheet for a few minutes before transferring to a wire rack to cool completely.
Notes
- Substitute vegetable oil with melted butter for richer flavor.
- For a chewy texture, do not overbake the cookies.
Nutrition
- Serving Size: 1 cookie
- Calories: 150
- Sugar: 12g
- Sodium: 85mg
- Fat: 5g
- Saturated Fat: 1g
- Unsaturated Fat: 4g
- Trans Fat: 0g
- Carbohydrates: 22g
- Fiber: 1g
- Protein: 2g
- Cholesterol: 20mg
Keywords: Vintage Chocolate Crinkle Cookies