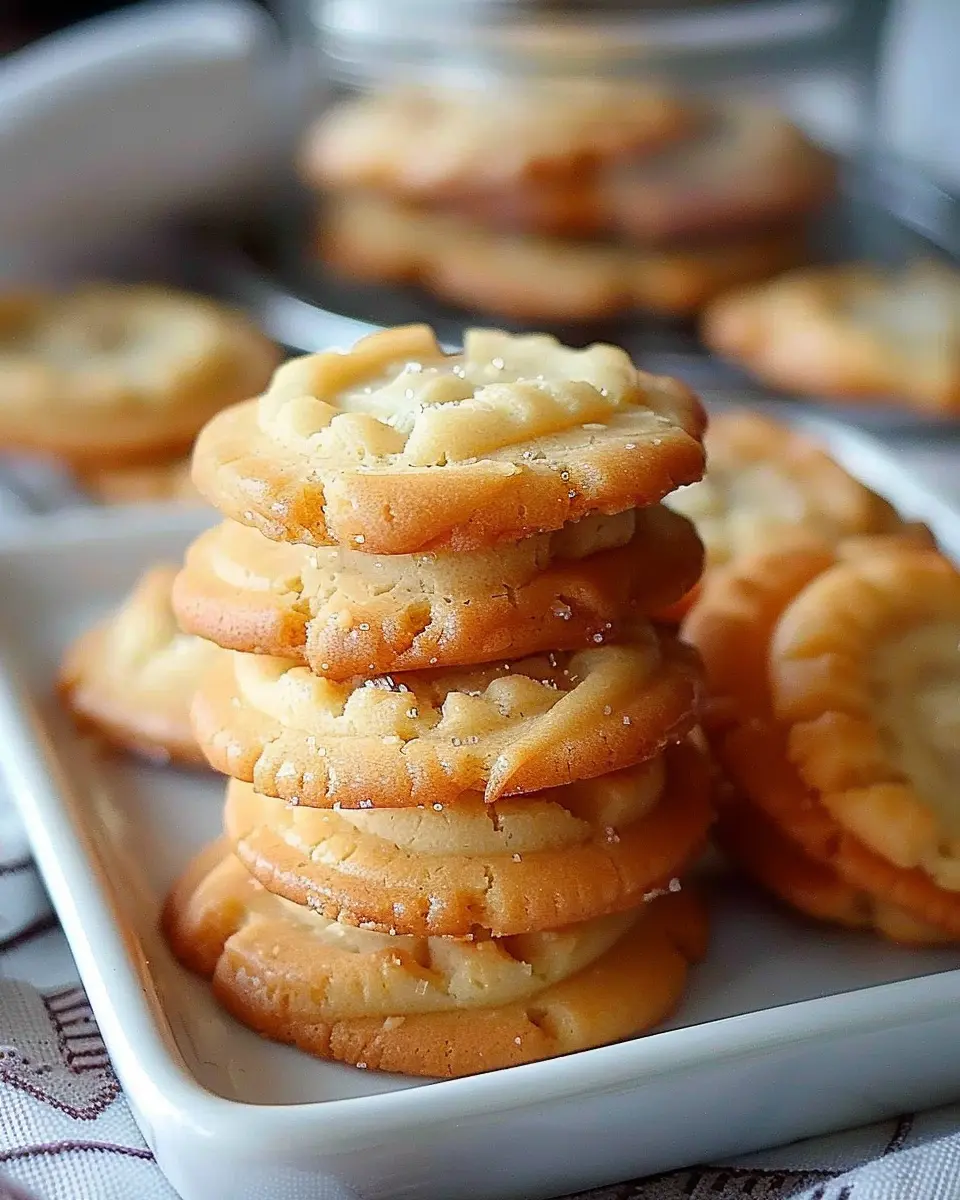
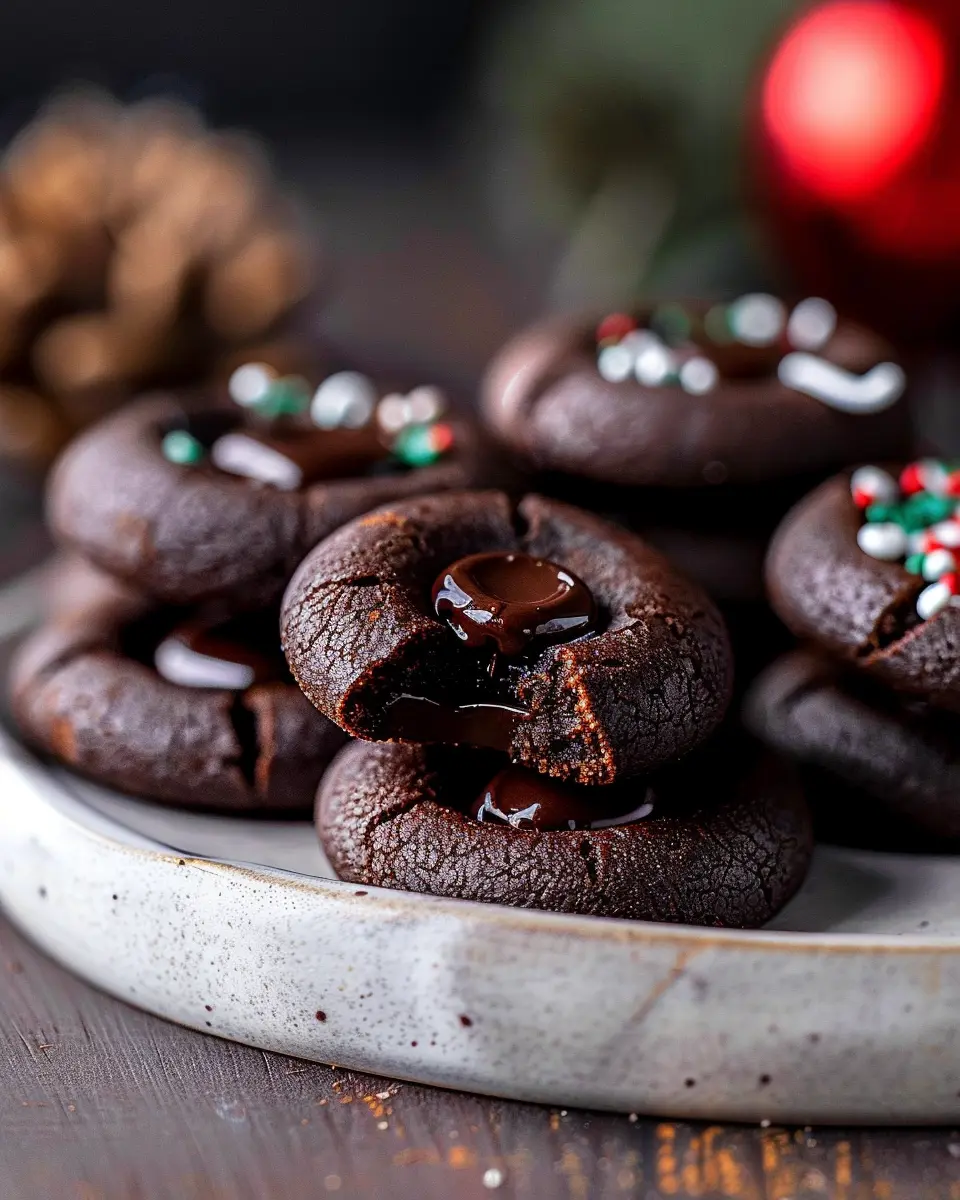
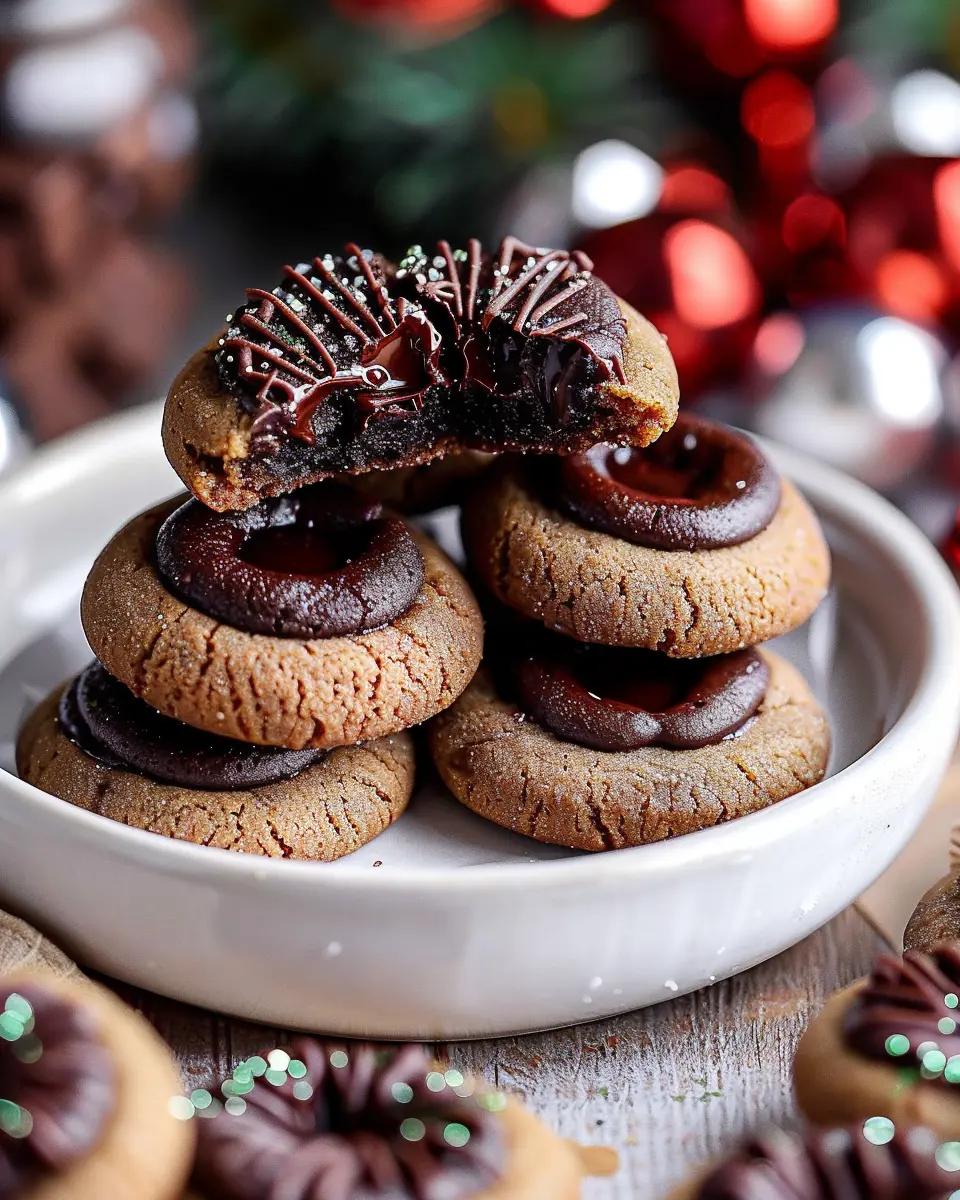
Introduction to Chocolate Thumbprint Cookies
When holiday baking rolls around or you’re just looking to satisfy a sweet craving, Chocolate Thumbprint Cookies are an absolute must-try. These delightful treats have a unique appearance that combines the charm of a cookie with a luscious filling—often a dollop of rich chocolate or fruity jam nestled right in the center. But what makes them stand out even more?
Why are Chocolate Thumbprint Cookies a Must-Try?
First off, let’s talk texture. Each bite of a Chocolate Thumbprint Cookie offers a perfect balance between a soft, chewy cookie base and a creamy or gooey filling. This contrast not only pleases the palate but also turns a simple cookie into a sensory delight. You can find inspiration for variations across sources like Serious Eats or Bon Appétit, where innovative fillings and flavor combinations are explored.
Moreover, the versatility of Chocolate Thumbprint Cookies is truly commendable. You can whip up a traditional chocolate filling or experiment with flavors like raspberry jam, salted caramel, or even peanut butter. Serving them at your next gathering? These cookies are sure to impress guests with their gourmet look and taste, making them a conversation starter.
Have you ever found yourself staring at a dozen plain chocolate chip cookies, thinking, “This could use a little pizzazz”? Enter the Chocolate Thumbprint Cookie. The thumbprint isn’t just for show either; it creates a perfect little indentation for that decadent filling.
A Little Bit of History
Originating in Europe, thumbprint cookies have evolved through generations of passionate bakers. Their roots can be traced back to an age when home-cooked meals and baked goods were a sign of love and hospitality. Many cultures have adopted their own versions, further enhancing the cookie’s legacy and charm.
So, whether you’re a seasoned baker or someone looking to impress on a casual weekend gathering, these cookies are fun to make, share, and nibble on. Join me in exploring the delightful journey of crafting your Chocolate Thumbprint Cookies—you won’t be disappointed!
Ingredients for Chocolate Thumbprint Cookies
Creating delightful Chocolate Thumbprint Cookies begins with gathering some key ingredients that come together to create rich, chocolatey goodness. Here’s what you’ll need:
- All-purpose flour (1 ¾ cups): This is your base, adding the perfect texture to your cookies.
- Unsweetened cocoa powder (½ cup): It gives that intense chocolate flavor we’re all craving.
- Butter, softened (½ cup): Using good quality butter is essential for that rich taste and tender crumb.
- Granulated sugar (½ cup): For just the right amount of sweetness.
- Brown sugar (½ cup): Adds moisture and a slight hint of caramel flavor.
- One large egg: This helps bind everything together while giving the cookies a lovely structure.
- Vanilla extract (1 teaspoon): Elevates the flavor profile beautifully.
- Chocolate chips or your favorite filling: (Optional) For that delightful surprise in the center.
Once you’ve pulled these ingredients together, you’re well on your way to enjoying scrumptious Chocolate Thumbprint Cookies that everyone will love! For more tips on baking perfectly, check out resources like Serious Eats or BBC Good Food for more inspiration and techniques.
Step-by-Step Preparation for Chocolate Thumbprint Cookies
Baking Chocolate Thumbprint Cookies is an engaging and rewarding process that fills your kitchen with a delightful aroma, while also achieving a satisfying treat perfect for gatherings or a sweet escape during your busy week. Here’s a straightforward guide to help you create these luscious cookies step by step!
Gather Your Ingredients
Before you dive into the baking process, it’s crucial to gather all your ingredients. This not only streamlines your workflow but also prevents any last-minute runs to the store. For these Chocolate Thumbprint Cookies, here’s what you’ll need:
- 1 cup unsalted butter, softened
- 1 cup granulated sugar
- 2 large eggs (room temperature)
- 1 teaspoon vanilla extract
- 3 cups all-purpose flour
- 1/2 teaspoon baking powder
- 1/4 teaspoon salt
- 1 cup chocolate chips (for ganache filling)
You might already have some of these staples in your pantry, but if you’re unsure, check out this comprehensive guide on baking essentials (source) when putting your ingredient list together.
Prepare the Cookie Dough
Once you have your ingredients ready, it’s time to prepare the dough for your Chocolate Thumbprint Cookies. Here’s how to do it:
-
Cream the butter and sugar: In a large mixing bowl, use an electric mixer to beat the softened butter and sugar until the mixture becomes light and fluffy—about 3-4 minutes. This aeration is key to getting that perfectly soft cookie texture.
-
Add eggs and vanilla: Beat in the eggs one at a time, followed by the vanilla extract, until fully incorporated.
-
Combine the dry ingredients: In a separate bowl, whisk together the flour, baking powder, and salt. Gradually mix the dry ingredients into the wet ingredients until just combined. Be careful not to overmix; you want to retain a tender cookie texture.
Form the Thumbprints
Now comes the fun part! Once your dough is ready, it’s time to shape your cookies. Here’s how to make those signature thumbprints:
-
Preheat your oven: While shaping, preheat your oven to 350°F.
-
Shape the dough: Scoop about a tablespoon of dough and roll it into a ball. Place the balls on a baking sheet lined with parchment paper, about 2 inches apart to allow for spreading.
-
Create the thumbprints: Using your thumb or the back of a small measuring spoon, gently press down into the center of each cookie to create a well—this is where the chocolate ganache will go!
Bake the Cookies
It’s time to bake those delightful Chocolate Thumbprint Cookies! Here’s the process:
-
Bake: Place the baking sheet in the preheated oven and bake for 10-12 minutes, until the cookies are just set and lightly golden on the edges.
-
Cool: Remove them from the oven and let the cookies cool on the baking sheet for about 5 minutes before transferring them to a wire rack to cool completely.
This is a great time to sip on a warm beverage—perhaps a cup of hot cocoa or a festive herbal tea that pairs beautifully with chocolate.
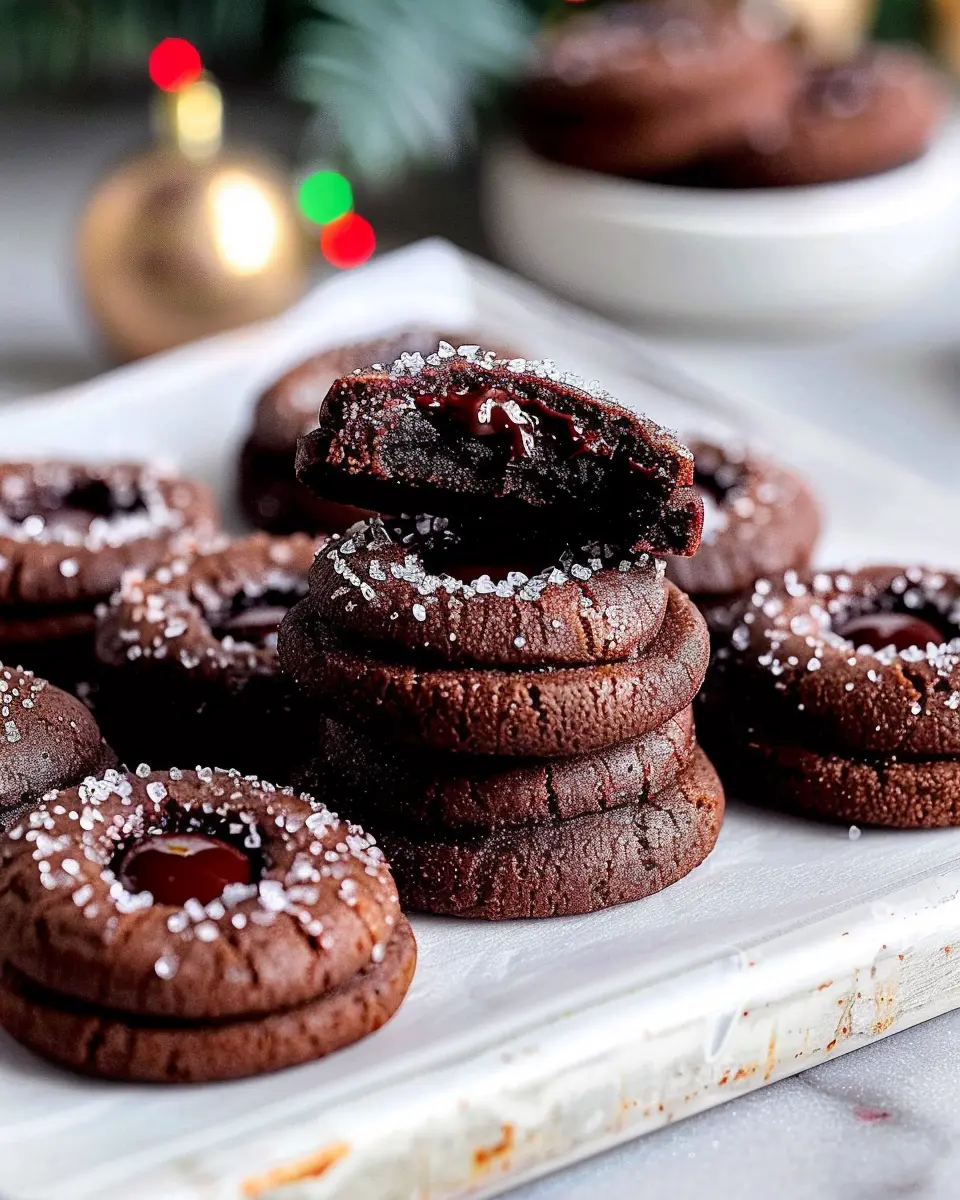
Fill with Chocolate Ganache
The finishing touch for your Chocolate Thumbprint Cookies is the luscious ganache filling. Here’s how to create it:
-
Make the ganache: In a small saucepan over low heat, combine the chocolate chips and a splash of heavy cream. Stir constantly until melted and smooth.
-
Fill the cookies: Once the cookies are far cooler, use a spoon to fill each thumbprint with the chocolate ganache. Allow chocolate to set before serving.
And there you have it! A beautifully delicious batch of Chocolate Thumbprint Cookies that are sure to impress your friends, family, or even just yourself after a long day. Enjoy these cookies fresh or share them as a delightful gift!
For more baking tips and cookie inspiration, feel free to check out resources like Serious Eats for expert advice and recipes. Happy baking!
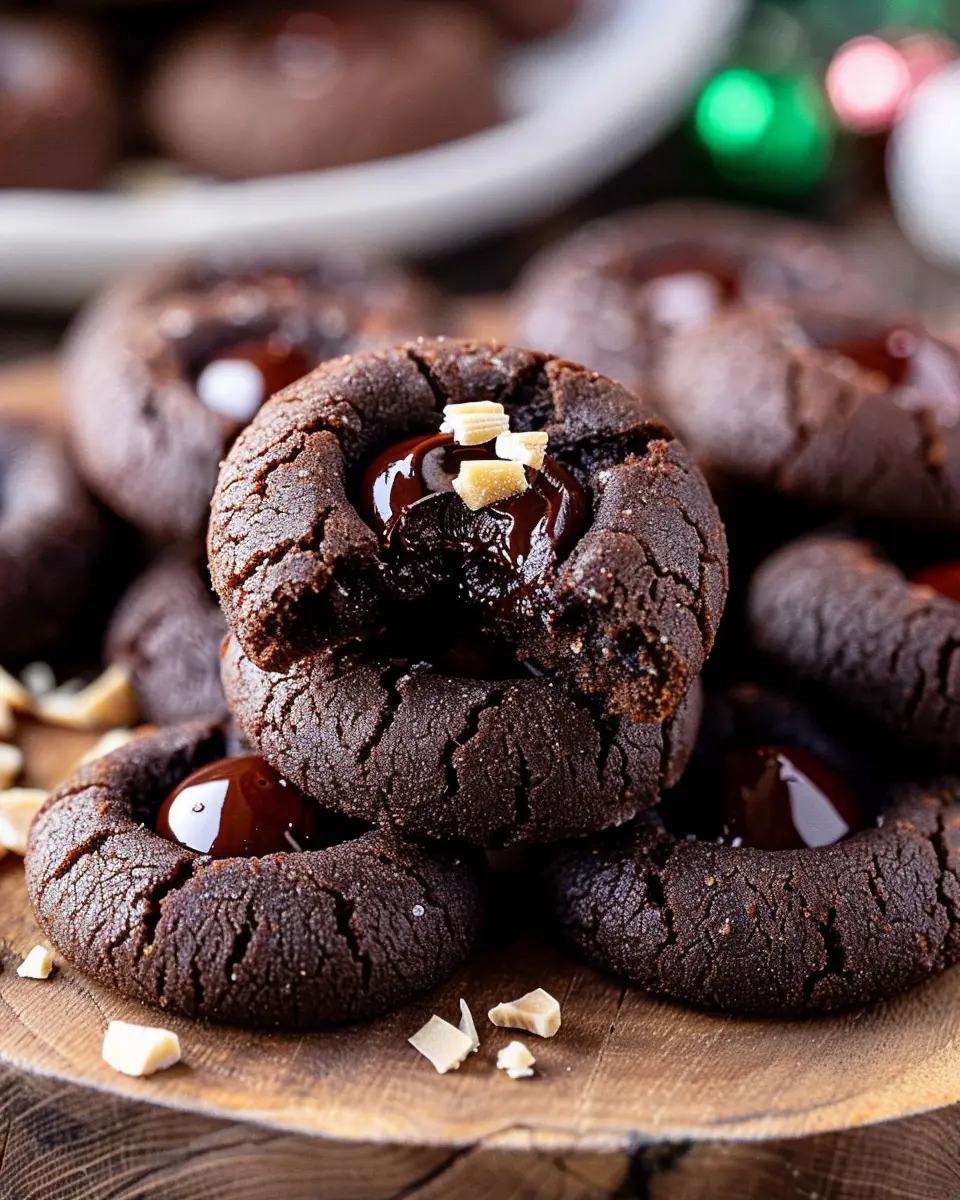
Variations of Chocolate Thumbprint Cookies
Classic Chocolate Variation
When we think of Chocolate Thumbprint Cookies, the classic version often steals the spotlight. Picture this: rich, buttery dough gently pressed with a thumb to create the perfect little well for our favorite filling. Dark chocolate ganache? Yes, please! For a smooth and silky texture, melt high-quality dark chocolate and mix in a splash of heavy cream until velvety. Not only does this filling add a luxurious taste, but it also harmonizes beautifully with the cookie’s crumbly exterior. Want to switch it up? You could try a raspberry or orange jam for a fruity twist, balancing the deep chocolate flavor with a hint of acidity.
Nutty Chocolate Thumbprint Cookies
If you’re looking to add a little more character to your Chocolate Thumbprint Cookies, try a nut-infused variation. Imagine biting into a cookie that showcases a delightful crunch from chopped nuts like pecans or hazelnuts mixed right into the dough. You could even roll the edges of the cookie in crushed nuts for that extra texture. For the filling, how about a nutty chocolate spread or a luscious praline ganache? The delightful combo of chocolate and nuts is not just pleasing to the palate but also adds a nutritional boost, making every bite feel a bit more indulgent yet wholesome. According to the FDA, nuts can provide heart-healthy fats, which makes these cookies a guilt-free treat!
So, which variation calls to you? Classic or nutty? You can share your delightful cookie experiences on social media or join community forums to exchange tips and tricks on baking the perfect Chocolate Thumbprint Cookies. Happy baking!
Baking Tips and Notes for Chocolate Thumbprint Cookies
Creating the perfect Chocolate Thumbprint Cookies requires some thoughtful techniques, but don’t worry—baking can be both fun and rewarding! Here are some essential tips to elevate your cookie game.
Use Quality Ingredients
When it comes to chocolate thumbprint cookies, the quality of your chocolate matters. Opt for a rich dark chocolate that you’ll enjoy eating on its own. High-quality butter also makes a difference in flavor and texture.
Don’t Skip the Chilling Process
Chilling the dough before baking helps the cookies maintain their shape. It’s tempting to skip this step in a hurry, but trust me, a little patience pays off!
Perfect Your Thumbprint Technique
To create that classic thumbprint, use your thumb or the back of a measuring spoon gently. If the dough starts to crack, it’s a sign you might be pressing too hard, so ease up a bit.
Experiment with Fillings
While classic jams work beautifully, consider creamy peanut butter or fudgy ganache for a twist. Each variation adds its unique charm!
For more tips and techniques, check out resources from the American Baking Association and King Arthur Baking. Happy baking!
Serving Suggestions for Chocolate Thumbprint Cookies
When it comes to enjoying your Chocolate Thumbprint Cookies, the possibilities are endless! These delightful treats not only satisfy your sweet tooth but also serve as a versatile dessert for various occasions. Here are a few creative serving suggestions to elevate your cookie game:
Pair with Fresh Brews
Why not enjoy your Chocolate Thumbprint Cookies with a freshly brewed cup of coffee or tea? A rich, dark roast coffee complements the chocolate perfectly, highlighting its sweet notes. On the other hand, a soothing chamomile tea offers a lovely contrast, making every bite feel special.
Serve with Dips
Consider serving your cookies with a side of silky chocolate ganache or creamy Nutella for an indulgent twist. This will enhance the flavor and create a fun, interactive dessert experience for your guests.
Plate Presentation
Presentation matters! Arrange your cookies on a beautiful platter garnished with a sprinkle of powdered sugar and fresh mint leaves. This not only adds a pop of color but also impresses your guests.
With these serving suggestions, your Chocolate Thumbprint Cookies are sure to be a hit, whether it’s a casual gather or a festive celebration. For more delectable pairing ideas, check out this fantastic resource on dessert pairings from The Kitchn.
Time Breakdown for Chocolate Thumbprint Cookies
Preparation Time
Making Chocolate Thumbprint Cookies is a delight, and the prep time is just about 20 minutes. During this time, you’ll mix the dough, create a few indents for that signature thumbprint, and get ready for the oven. Make sure you have all your ingredients laid out before you start—it makes the process so much smoother!
Baking Time
Once you’ve prepped your cookies, it’s time for them to shine in the oven. Baking takes around 12-15 minutes. Keep an eye on them towards the end; you want that perfect balance of chewy and crispy.
Total Time
When you combine both preparation and baking times, you’re looking at around 35 minutes to enjoy these delightful Chocolate Thumbprint Cookies. Perfect for a quick treat or an easy dessert for a gathering!
For some tips on the best baking practices, you may want to check out King Arthur Baking—they have fantastic resources to elevate your cookie game.
Nutritional Facts for Chocolate Thumbprint Cookies
When indulging in Chocolate Thumbprint Cookies, it’s great to know what you’re enjoying. Here’s a quick breakdown of their nutritional benefits—allowing you to savor each bite guilt-free.
Calories
These delightful cookies pack around 100 calories each, making them a perfect sweet treat without going overboard.
Protein
While cookies may not be protein powerhouses, each serving includes about 1.5 grams of protein. A little boost to keep you going during your busy day!
Sugar Content
With approximately 8 grams of sugar, the Chocolate Thumbprint Cookies strike a balance between sweet and satisfying.
For a deeper dive into cookie nutrition, check out the USDA database for comprehensive food insights. And remember, moderation is key in every delicious bite!
Frequently Asked Questions about Chocolate Thumbprint Cookies
Can I make these cookies gluten-free?
Absolutely! Transforming your Chocolate Thumbprint Cookies into a gluten-free delight is easier than you might think. Simply substitute regular flour with a gluten-free blend, ensuring it includes xanthan gum for better texture. Many brands, like Bob’s Red Mill or King Arthur Baking, provide excellent gluten-free options that mimic the qualities of all-purpose flour well.
What can I substitute for the chocolate filling?
If you want to switch things up, there are plenty of alternate fillings that can enhance your Chocolate Thumbprint Cookies. Consider using fruit preserves like raspberry or apricot for a fruity twist, or even butterscotch and caramel for extra sweetness. Nut butter can be a tasty and unexpected filling, too! For a healthier option, try dark chocolate chips melted with a splash of coconut oil for a richer treat.
How do I prevent the cookies from spreading too much?
We’ve all been there—cookies spreading into one giant mess on the baking sheet! To keep your Chocolate Thumbprint Cookies perfectly shaped, use chilled dough. Once you’ve made your dough, refrigerate it for at least 30 minutes before baking. This helps the cookies maintain their structure. Also, using parchment paper can help create a moisture barrier that prevents spreading.
If you’re interested in more cookie-making tips, check out the resources from The Cookie Monster or America’s Test Kitchen. Happy baking!
Wrapping Up Your Chocolate Thumbprint Cookies Adventure
In conclusion, Chocolate Thumbprint Cookies are a delightful treat that combines rich flavor with the fun of personalization. Whether you’re making them for a special occasion or just to enjoy with a cup of coffee, these cookies are sure to impress. Remember, the key to success lies in the balance of ingredients and the love you put into creating them.
- Experiment with Fillings: Don’t hesitate to try different fillings, from fruit jams to nut butters, for a unique twist.
- Share the Joy: Consider gifting these cookies to friends or colleagues; they’re perfect for spreading joy.
For other baking tips, check out resources from sites like King Arthur Baking or Food Network. Happy baking!
PrintChocolate Thumbprint Cookies: The Best Indulgent Treats for Home Bakers

These Chocolate Thumbprint Cookies are the perfect indulgent treats for home bakers looking to impress. Rich chocolate flavor with a delightful filling makes them a must-try!
- Prep Time: 15 minutes
- Cook Time: 15 minutes
- Total Time: 30 minutes
- Yield: 24 cookies 1x
- Category: Desserts
- Method: Baking
- Cuisine: American
- Diet: Vegetarian
Ingredients
- 1 cup unsalted butter, softened
- 1 cup granulated sugar
- 2 large eggs
- 1 teaspoon vanilla extract
- 2 cups all-purpose flour
- 1 cup cocoa powder
- 1 teaspoon baking powder
- 1/2 teaspoon salt
- 1 cup chocolate chips for filling
Instructions
- Preheat your oven to 350°F (175°C).
- In a large bowl, cream together the butter and sugar until smooth.
- Add eggs one at a time, mixing well after each addition. Stir in the vanilla.
- In another bowl, combine the flour, cocoa powder, baking powder, and salt.
- Gradually add the dry ingredients to the wet mixture, mixing until just combined.
- Roll dough into 1-inch balls and place on a baking sheet.
- Use your thumb to make an indentation in the center of each ball.
- Fill each indentation with chocolate chips.
- Bake for 12-15 minutes or until set.
- Let cool completely before serving.
Notes
- For a variation, try using different types of chocolate for the filling.
- Ensure the chocolate chips are placed in the center before the cookies bake for best results.
Nutrition
- Serving Size: 1 cookie
- Calories: 150
- Sugar: 10g
- Sodium: 100mg
- Fat: 8g
- Saturated Fat: 5g
- Unsaturated Fat: 3g
- Trans Fat: 0g
- Carbohydrates: 18g
- Fiber: 1g
- Protein: 2g
- Cholesterol: 30mg
Keywords: chocolate thumbprint cookies, cookies, baking, dessert